If you haven't heard of woodchip wallpaper, you are not missing out. It's often very tired-looking, dated and infamous in the DIY world for being extremely difficult to remove.
Whilst I'm sure it was once the latest trend in wall decoration, it certainly isn't now, and when we moved in we found the whole living room of our house coated with several layers of the stuff.

We set aside a whole weekend, determined to be rid of it and get some paint up on the walls!
Whilst I'm sure it was once the latest trend in wall decoration, it certainly isn't now, and when we moved in we found the whole living room of our house coated with several layers of the stuff.
We set aside a whole weekend, determined to be rid of it and get some paint up on the walls!
This kind of job is made much easier by using a steaming tool to cut through the initial layer of the woodchip. We used one from Black & Decker which worked a treat, but you can get them from any good DIY store.
Upon inspection of the wallpaper, we found it to have two distinct layers - The tough, outer layer of woodchip (the white layer in the photo) which had formed a plasticy texture where paint had merged with the woodchip. This was VERY difficult to remove and required quite a bit of elbow grease. Underneath it was a thinner, sticky paper texture, which came away much more easily using the steamer and a wallpaper scraper.
 |
| Top layer on the left, bottom on the right. |
 |
| Daniel VS woodchip! On the left is bare wall - This is what your wall will look like once the woodchip is completely removed. |
We went around the room in a little production line. Dan removed the top layer and I followed behind him with the steamer, removing the second layer.
 |
| Daniel having a well-deserved rest! |
In all, it took around twelve hours - Six hours on the Saturday and six on the Sunday.
The following weekend, once the walls were dry, we scrubbed the walls top to bottom with sugar soap to make sure they were paint-ready, and painted the entire room with bright white builder's paint from Homebase to provide a nice clean base to start from.
Next, we painted the walls with Chic Shadow from Dulux, which is a lovely warm mid-grey. I really recommend this paint actually, it applied very smoothly and one tin seemed to go a really long way. Top tip when choosing paint colours - Search Pinterest for the specific colour/brand and often you will find images showing what that paint colour looks like in real homes, in different lights and against different furniture than your own. It's so hard to visualise paint colours in real life from looking at a tin of paint or a tester on your wall so this is a good tip!

Another idea for the colour-conscious - On the Dulux website they have a tool where you can choose your preferred paint colour and they will suggest other colours to complement it. They also have a little search engine which helps you work out which paint texture you need (matt, silk, eggshell etc). Fun and great for paint virgins!
Anyway, here's Chic Shadow going onto the walls. Excuse the patchiness, it was still drying.
 |
| First coat of Chic Shadow, by Dulux |
And the final gorgeous result!
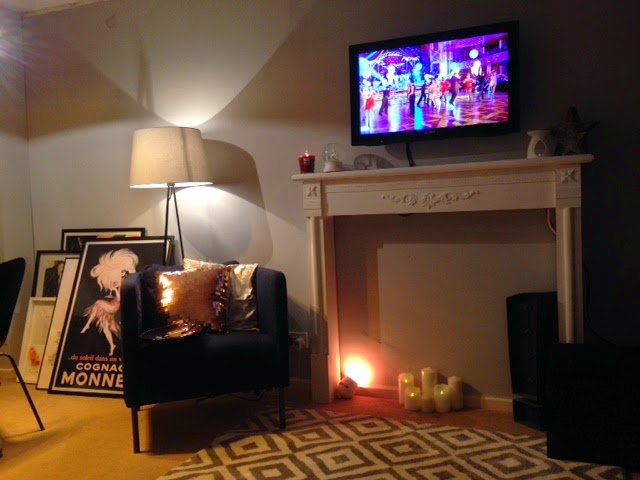
We love the way it looks and it really has completely modernised the living room. For anyone wanting to remove woodchip from your home, I hope this post hasn't daunted you too much but shown you that while it's not easy, it IS do-able! *satisfied sigh*
The next step will be to add faux-coving around the ceiling edge and laminate flooring to finish it off, but that will be for another post another day!
That's all for now, I hope this post has helped you out or given you some inspiration.
- Em
- Em


